In this blog post, I am going to show you how to make a banner for a website. We will take a look at one of my favorite tools to use when creating content. Having a professional look to my website and my social media accounts is very important to me. Canva.com is a graphic design platform that can be used to create all kinds of graphics.
They even have thousands of custom templates to choose from as well as stock photos and videos to add to your design.
There is so much to talk about when it comes to the possibilities with this tool, but in this post let's just focus on how to create a blog banner using Canva.
Step 1: Choose a Template Under Blog Banners
The dimensions for most blog banners should be around 2240 x 1260 px. Canva has preset templates just for blogs that are listed under “Blog Banner.”
Simply choose Blog Banner and you can then either browse through thousands of templates or you can create one from scratch (a blank banner).
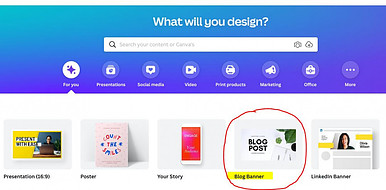
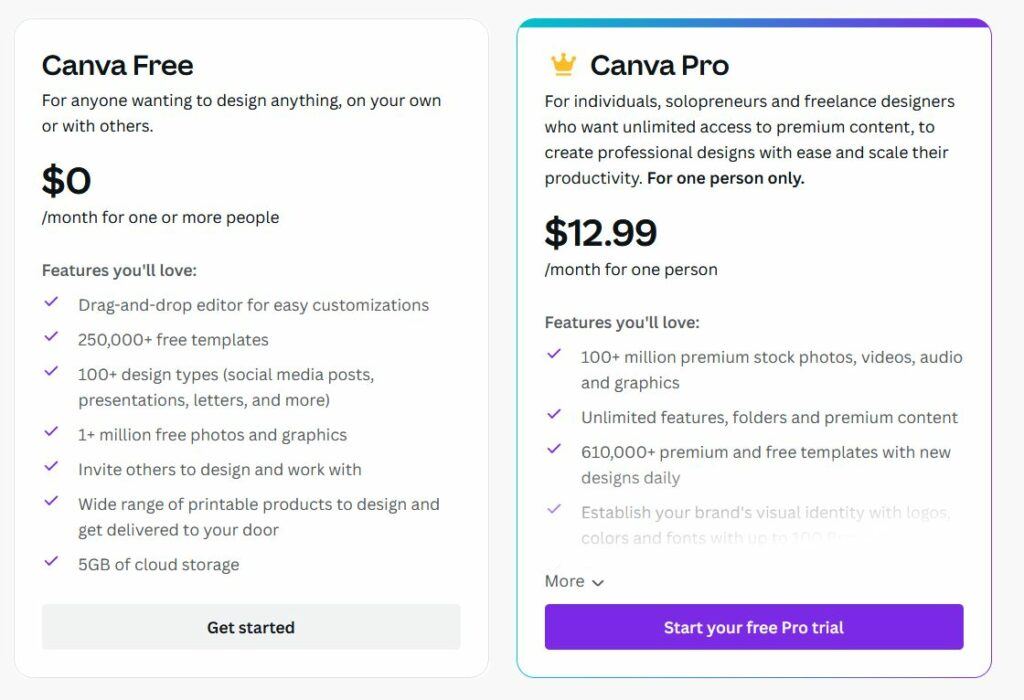
There are plenty of templates to choose from, many of which are free. Keep in mind that there are also “Pro” templates that only “Pro” members can use. The pricing for Pro membership is very reasonable and if you are a blogger or content creator at any level, you will definitely benefit from a Pro Membership at Canva.
But if you are still on a budget, then the Free options are plentiful and great to use.
Step 2: Add Your Own Text
Once you have chosen a template, you can begin to edit or add your own text. It's easy to do and there are even options to change the font and color. Here is a look at the original template I used recently for one of my blog posts.
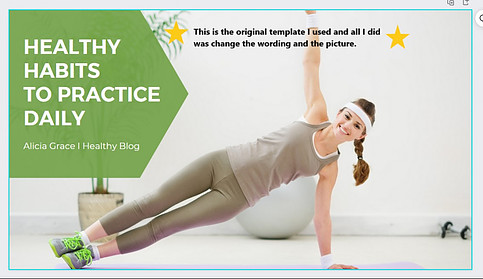
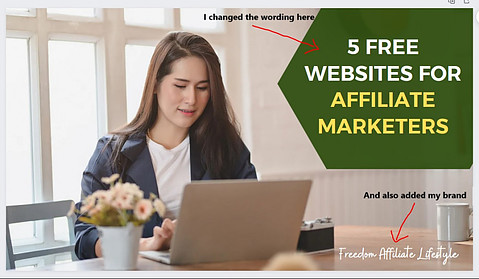
I merely changed the wording in the green area and also moved it to the other side. I changed a bit of the coloring to emphasize the words and lastly added my personal brand (Freedom Affiliate Lifestyle) to the bottom corner. Here's a look:
Step 3: Add Images
As you can see, I decided to change the image in this particular template because my blog post wasn't about health and exercise. So I just chose from one of the many images available on Canva.
I did a quick search for “woman working on computer” in the elements section and found this picture. Selecting and dragging it over to the template in order to replace the other picture.
You can also upload your own pictures if you choose to. I've done this many times for my other website that's about camping and the RV life.
⇒⇒ Build Your Own Website HERE ⇐⇐
Step 4: Animate Your Banner (Optional)
This next step is completely optional, but you can in fact animate your blog post. By choosing to have the text slide in or fade in or even tumble in, you can easily create a dynamic blog post banner that gets noticed.
The images can also be animated to draw more attention to them. It's really up to you and it depends on what kind of blog post you are creating. I usually choose to keep my blog banners static, but I have made several Instagram posts that are animated.
Step 5: Download and Save
Lastly, you will need to download and save your blog banner creation to your computer. You can choose what file type you want to download, for instance PNG, JPG, MP4 video, etc.
After you've downloaded the banner, simply save it to your computer and place it on your website. I like to use the “featured image” option within WordPress to upload my banners to for each blog post. But this of course depends on what theme you are using.
Final Thoughts
Content creation can seem daunting at times, but if you have the right tools you can streamline your business and make the entire process more efficient. That's what I love about Canva… you can create virtually anything that you need for posting to your website, YouTube, social media, etc.
After I have written a blog post, I use Canva to create my blog banner. Then I create at least 1-2 social media posts to announce that I have a new blog post up. Usually I do an Instagram post or story and a Facebook post. Canva gives me the platform and tools to make professional and engaging designs that help boost my business.
Creating blog banners is just one of the MANY things you can do with Canva. Give it a try and make your own banner. I guarantee you will be hooked.

Elizabeth teaches people how to make money online through affiliate marketing. Her tips and strategies help readers earn a Full-Time Income from home. She shares easy steps for success on her blog. Follow her to start your journey!






Thank you for sharing this useful program! This was very informative as I have only used images for my blog banners but now I see I should be creating something a little more customized. Canva seems like a great tool to use, I like how they have different types of images like “blog banner” so you don’t have to guess at what size you should be using. I tried to learn photoshop many years ago but there was just so much to it, it was like trying to learn another language. This program seems much friendlier and easy to use for those of us who are not photo experts. I love your website thank you for sharing such valuable information!
Yes, Canva is much more user-friendly and I find that I also get inspiration from some of the preset templates. Glad you liked the recommendation and hope you are able to use this program to create great content in the future.
I’ve been using Canva for 3 years and it is a great tool to have for when you are making logos and banners. This cuts out having to pay someone to create you something when you can do it yourself possibly for free unless you get the paid option. I like it because you can download images for other free image websites and add to them making them your own. And it’s very easy to use.
I have always enjoyed sites that have these cool illustrations and banners. I thought it was a graphical designer that made them. But I am so happy to discover I can make my own and it seems so easy. I will go check Canva since it’s free to start using. Thank you for encouraging me to give it a try!
You are welcome… hope you find it useful.